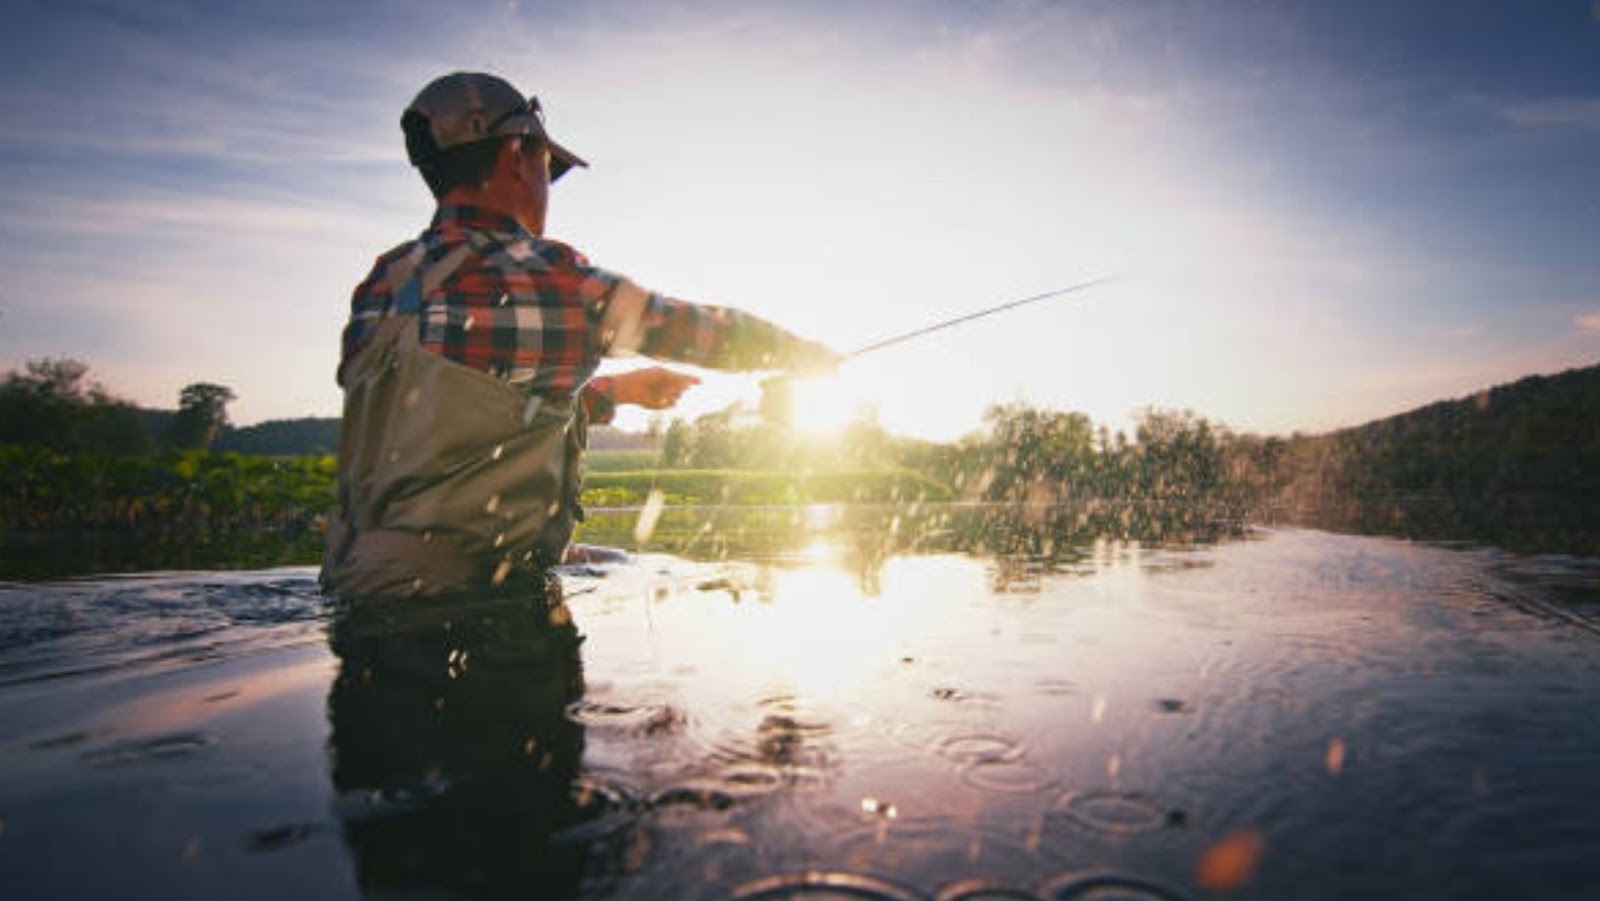
To gather the equipment for fly fishing, start with the right fly rod, reel, line, leaders, and tippets. This will ensure you have everything you need for success on the water. In this section, we will guide you through gathering your equipment. We will cover how to choose the right fly rod, select the reel that suits you, pick the right line, and choose suitable leaders and tippets.
Choosing the Right FlyRod
For anglers, selecting the perfect fly rod can determine their fishing success. The right fly rod must match the size of the fish and lure, as well as fit an angler’s casting style. To help anglers understand how to choose the right fly rod, here is a table that outlines the different variables:
| Variable | Description | Guidelines |
| Fishing Location | Rivers or Stillwaters have various sizes of fish and distance | The Fishing Rod length should vary between areas. |
| Fishing Strategies & Techniques | Dry Fly, Nymphing, or Streamer fishing styles require different types of Rods | Different Types of action, lengths, and materials are required for each technique. |
| Material Composition | Graphite, Bamboo, or Fiberglass Material can be chosen based on preferences. | Different performing characteristics for each material type. |
It is also essential to pick a rod that balances your needs concerning budget and skill level. More experienced anglers may prefer fast-action rods, while less experienced individuals may need help to use such rods. Some other factors to consider when choosing a fly rod include handle design, line weight rating, reel size compatibility, and warranty options available. According to Angling Times magazine, choosing the right fly rod is just as important as selecting the right bait when it comes to fishing. All these factors play an important role in choosing the right fly rod that suits your needs and helps you catch more fish. Choosing a reel is like picking a life partner – it’s all about finding the right balance of strength, durability, and compatibility with your needs.
Selecting the Reel
When choosing the perfect gear for gathering equipment, one must consider the appropriate reel for their fishing needs. Here’s a breakdown of what to look for when selecting fishing reels:
| Column 1 | Column 2 |
| Drag System | Choose between front or rear drag systems based on your preferences. |
| Gear Ratio | Consider the speed, power, and efficiency that different gear ratios offer. |
| Line Capacity | Ensure your reel can handle the line you need for your target species and location. |
Additionally, it’s crucial to consider the type of fish being targeted and the environment they inhabit when selecting a reel. For instance, a baitcasting reel might be more suitable if you’re going after larger freshwater species like Bass. On the other hand, if you plan on taking on saltwater fish like Tuna or Marlin, then a spinning reel with powerful drag capabilities may be better.
As an experienced angler recalls in his account, he once thought he had chosen the wrong reel but later found out it was only due to poor maintenance. He advises properly caring for your reels to ensure optimal performance and longevity. With these considerations in mind, finding the perfect spin to help collect equipment will be smoother than ever before.
Choosing the perfect fishing line is like finding a needle in a haystack – except the hand costs $50, and the haystack is your wallet.
Picking the Right Line
Picking the Perfect Line:
The right fishing line choice is crucial for a successful catch. Here are some points to consider when selecting your gear:
- Water Clarity: Clear water requires a clear or transparent line with low visibility. In contrast, murky water may require a more visible color.
- Bait Type: Different types of bait require different lines. Match your line to the weight and type of appeal you plan to use.
- Line Strength: Consider the strength required for your target species. A heavier line may be necessary for larger fish, while smaller fish can be caught on lighter lines.
- Casting Distance: The length of your cast can influence your choice. Thinner lines provide better casting distance but have less strength than thicker lines offering shorter forms.
- Fishing Technique: How you fish should also inform which line type you choose. Use an appropriate line according to whether you’re trolling, bottom fishing, or casting.
Another point to remember is that ultra-thin lines offer better sensitivity, causing little to no strain on the angler and the rod.
Don’t Make The Mistake Of Choosing The Wrong Line!
Now that you know what kind of line to choose for your fishing scenario, you must avoid making mistakes that could cost you precious catches! Remember always first check the conditions before going out. You must understand how fishing works and put yourself in the best position possible by providing the right equipment! Choose wisely and get started today!
Choosing leaders and tippets is like picking the perfect partner for your fishing adventure – they must be strong, flexible, and able to handle your reel demands.
Choosing Leaders and Tippets
Leaders and Tippets are critical equipment for any angler. The right choice of these accessories can make all the difference in your fishing experience.
| Leader Length (FT) | Tippet Size (X) | Target Species |
| 7.5-9 | 3-6X | Trout |
| 9-12 | 0X-2X | Bass, Pike, Steelhead, Salmon |
| >12 | <1X | Tarpon, Bonefish, Permit, Sailfish |
When choosing leaders and tippets, you should consider the type of fish you’re targeting, the water conditions, and your preferred method of fishing. A longer leader is better for clear water or when using smaller flies, while shorter leaders are ideal for murky or turbulent waters.
It is essential to choose the right material as well. Fluorocarbon is virtually invisible underwater, making it ideal for trout fishing. Conversely, monofilament leaders stretch more and float easier on top of the water. Braided wire or heavy nylon are excellent choices for predator fishing, such as pike or musky.
A surprising fact that could come in handy is that a leader’s purpose in fly fishing is to provide invisibility from fish while transmitting energy efficiently between fly line and fly.
Who needs a therapist when you can assemble a fishing rod and pretend you’re a master angler?
How To Set Up a Fly Fishing Rod
To assemble your fly fishing rod effectively, you need to connect the reel to the rod and easily join the rod sections. In this segment, we’ll describe how to set up a fly fishing rod by covering two sub-sections: connecting the reel to the rod and joining the rod sections, providing the necessary solution for correctly assembling your rod.
Connecting the Reel to the Rod
When assembling the fishing gear, connecting the reel to the rod is crucial. This marital bond between these two important components ensures a comfortable and efficient fishing experience.
Here’s a six-step guide on how to securely connect the reel to the rod:
- Identify which part of the rod you need to connect your reel onto. Typically, this will be the widest part of the butt section.
- You’ll need to slide your reel seat tightly over this area of your rod.
- Next, thread your fishing line through your guiding rings, starting with the one closest to where you have attached your reel.
- Pull out enough lengths from an end of your fishing line and tie it onto your spool – by looping it and then tying it around itself a few times for added security. Ensure that you keep holding firm and tension in place so that it can stay upright.
- Wind on or load up some length of fishing line into your designated reel spool; this can be done manually or with available tools or instruments.
- Tighten down all locking nuts on top of the base seat so that they hook down securely, creating a tight fit between the spinner and breadboard.
Ensure everything is secure before heading out on an exciting day’s angling journey.
Remember, each rod and reel combination is unique, but these simple steps should help you comfortably connect any type or style.
Lastly, did you know that connecting reels to rods dates back centuries? Ancient Egyptians used rawhide laces as connecting materials between their reels and rods!
Brace yourselves; it’s time to join the rod sections and make it one long, sturdy shaft like my ex’s new boyfriend.
Joining the Rod Sections
When assembling the rod, it is crucial to join the different rod sections properly. Here’s how to do it:
- Start by ensuring all the sections are clean and free from dirt or debris that may hinder a proper connection.
- Next, align each rod section’s male and female ends and carefully insert one into another until it clicks securely in place.
- Repeat this until all required sections are joined together, taking care not to twist or bend any part of the rod.
- Check that all joints are secure, and adjust if necessary.
- If your rod has additional guides, attach them now, ensuring they are fixed firmly onto each section of the rod.
It is worth noting that some rods come with specific instructions for joining their parts. Therefore, take time to read and follow these guidelines correctly.
Consider using compatible components from reputable manufacturers when assembling a new fishing rig. Doing so will ensure optimal performance and avoid unnecessary damage or stress on parts.
While trying to piece my first fishing rod together properly, I had overlooked minor alignment issues leading to constant breakages despite multiple repair attempts. It was an expensive lesson as I had lost numerous fish due to poor construction practices.
Get ready to fly…or at least the line attached to the fly.
Attaching the Fly Line
To easily attach the fly line, follow these steps – tying the line to the reel, threading the line through guides, and connecting the leader to the line. By doing so, you can ensure that the line is securely fastened to the reel and that it will run smoothly through the guides, giving you a better shot at catching fish.
Tying the Line to the Reel
You must use a proper technique to attach the fly line to the reel firmly. This will prevent it from slipping off and improve your fishing experience.
Follow these six simple steps to tie the line to the reel:
- Take off any previous backing and remove the spool from the rod.
- Tie an arbor knot on one end of the backing and then wind it around the spool a few times to lock it in place.
- Attach the running fly line to the support using a nail knot or surgeon’s knot.
- Wind the fly line onto the spool clockwise, leaving about 1cm of space between each layer.
- Feed the cable through each guide on your fishing rod before attaching your leader to it.
- Test your setup by pulling on both ends of your fly line. If properly secured, you should feel no slippage or give.
It is recommended to practice tying different knots before using them in actual fishing trips. This will allow you to master them without risking losing a catch.
Always check for any twists or kinks in your setup before heading out on your fishing trip – this can affect casting accuracy and distance.
According to Orvis, one of America’s oldest mail-order companies for outdoor products since 1856, improper attachment of a fly line can cause extreme frustration during fishing trips due to unexpected incidents like breakaways, poor casting distance, and tangling pipes.
Get ready to play the ultimate game of threading the needle but with a fishing line and guides instead!
Thread the Line Through Guides
Feeding the line through the guides of a fishing rod can be done with ease if you follow these tips. Ensure that your reel is securely fastened onto the rod, and ensure your line is untangled and ready to be fed through the guides.
- Start by holding your rod in one hand and pulling out the appropriate amount of line from your reel while holding it with your other hand.
- Feed the line through the largest guide closest to the reel, then progressively run it through each direction towards the rod’s tip.
- Once you arrive at the top guide, check that there are no tangles or knots in your line before making a cast.
- Gently shake your rod and put force onto its tip to ensure no tangles remain around any of its guides.
It’s important to remember that feeding your line through guides on a fishing rod is fundamental for successful casting. Remember, always use caution when working with sharp hooks and lines.
Ensure to tie an appropriate knot on your hook with each new cast. Using a previously used knot in such situations can result in losses if it fails.
Connecting the leader to the line is like finding a needle in a haystack, except the arrow is invisible, and the haystack is your tangled mess of fishing gear.
Connect the Leader to the Line
To properly connect your leader to the line, follow these simple steps. First, prepare the end of your fly line by removing any dirt or debris. Then, take your leader and tie a loop knot on one end. Next, pass that loop through the loop at the end of your fly line and pull it tight. Finally, trim any excess material and test the connection before casting.
It is important to note that different types of leaders may require slight variations in this process. Be sure to consult a trusted source or experienced angler for specific instructions.
Interestingly, anglers have been attaching fly lines to leaders since at least as far back as the 15th century when fishing with flies first became popular. Over the years, various techniques and knots have been developed and refined to create strong connections between line and leader for successful fishing trips.
Let’s hope the fly doesn’t fade once we attach it to the line.
Adding the Fly
To add the fly to your fly fishing rod, don’t worry; it’s not as difficult as it may seem. With the right tips and tricks, you can choose the right fly, tie it to your line, and add the correct weight to your queue to make your fly fishing experience successful. Let’s look at each sub-section: choosing the right fly, tying on the fly, and adding weight to the line.
Choosing the Right Fly
When selecting the appropriate fly for fishing, there are essential factors to consider. The fly choice will depend on several factors, including the water temperature, time of day, weather conditions, and type of fish you aim to catch. Each type of fly possesses its unique traits that make it suitable for a particular kind of fish in varying environments.
Here’s a comprehensive table that outlines the characteristics of different types of flies and their targeted species:
| Fly Type | Characteristics | Targeted Species |
| Dry | Floats on water’s surface | Trout, Salmon |
| Wet | Sinks below the water surface | Pike, Bass |
| Nymph | Imitates immature stages of aquatic insects | Trout |
| Streamers | Mimics small fish or leeches in motion | Bass |
| Terrestrial | Mimics land-based insects like beetles or grasshoppers | Trout, Carp |
Choosing flies that accurately match the natural food in the body of water you intend to fish in is essential. Consider consulting an expert at a local bait shop or search online for more information about fishing conditions in your target area.
Remember, each type of fly requires its unique technique and style when casting into the water. Mastering these nuances is critical if you want success when fishing.
Interestingly, the concept of choosing the appropriate fly has evolved. In ancient times across Europe, people fished using artificial flies made with horsehair instead of insects or bait. However, by the 19th century in Northern America, numerous patterns were available commercially. These designs have continued to advance throughout history up till now.
Time to get your fly fashion on because even fish appreciate a well-dressed angler.
Tying on the Fly
Attaching the Fly: A Professional Guide
Fishing enthusiasts know the importance of tying on a fly when luring in the perfect catch. Here is a 5-step guide for attaching the fly:
- Choose your fly
- Tie your leader to your line
- Select the type of knot you’ll use to connect your fly
- Tie your fly onto your leader using your chosen knot
- Trim any excess line or tag ends
When selecting a knot, choosing one that offers strength while allowing easy casting is essential. The Palomar, Clinch, and Improved Clinch knots are popular choices.
One key trick when tying on a fly is to leave a small gap between the hook and the knot. Doing so allows for better movement and increased chances of hooking a fish.
Did you know that artificial flies have been used in fishing for centuries? Ancient Greeks and Romans wrote about using intricate imitations made from feathers, fur, and other natural materials to lure fish. Today’s modern materials and techniques have only improved upon this age-old practice.
Because catching a fish is just a small victory, it’s time to up your game by adding weight to the line.
Adding Weight to the Line
The process of adding weight to the line is crucial in fly fishing. It enables the fly fisherman to present the fly naturally and make it visible to the fish. Here is how to add weight to your fishing line for successful fly fishing:
- Determine the size and type of fish you intend to catch
- Choose an appropriate size split shot or sinker
- Slide the sinker up your line, leaving enough room between the hook and sinker
- Pinch the sinker onto your line with pliers
- Test your rig by casting into shallow water, adjusting the amount of weight if necessary
- Begin fishing
Remember that some fish species prefer flies presented closer or farther from them, depending on certain conditions.
It is also important to note that adding too much weight can result in a less natural presentation of the fly.
According to Outdoor Life magazine, some experienced anglers suggest using tungsten weights as they produce less water drag than other types of consequences.
With these tips, you should be able to add enough weight for your specific needs when fly fishing and increase your chances of catching more fish.
Remember, the key to great casting isn’t just technique; it’s also making sure there aren’t any flies in your mouth.
Practicing Casting
To perfect your fly fishing skills, it is essential to master the technique of casting. To achieve this, the section ‘Practicing Casting’ with the sub-sections – ‘The Basic Casting Technique,’ ‘Perfecting Your Cast,’ and ‘Troubleshooting Casting Problems’ is presented as a solution. Each sub-section delves into specific casting areas, allowing you to improve your skills and become a more proficient fly fisher.
The Basic Casting Technique
Exploring the Art of Casting
Casting is a fundamental skill in fishing that every angler must know. It is where you throw the bait or lure into the water using a fishing rod and reel. Learning the basic casting technique can improve your chances of catching fish and enjoy a more rewarding fishing experience.
- Hold the rod with both hands and keep it perpendicular to the ground.
- Pull back on the rod with your dominant hand, lifting the bait or lure off the water.
- Use your wrist to flick the rod forward, releasing the trick or lure toward your target.
Mastering these steps will take time and practice, but by doing so, you will become a skilled caster in no time.
Additional Tips for Casting Success
To ensure success while casting, consider the following:
- Adjust your casting distance based on wind direction
- Use lightweight lines while casting small lures
- Keep a loose grip on the rod to allow for better movement
The History of Casting
The art of casting has been around for thousands of years. First used by hunters to catch fish for sustenance, it later evolved into a sport enjoyed by millions worldwide today. With advancements in technology, modern-day anglers have access to state-of-the-art equipment that has made casting simpler and more enjoyable than ever before.
Practice makes perfect, but you’ll be practicing bad casts if your fishing line is tangled.
Perfecting Your Cast
Casting is an essential aspect of fishing; perfecting it can increase the chances of catching fish. Enhancing your casting skills involves learning various techniques and tweaking them for precision and distance.
Here are six steps toward perfecting your cast:
- Choose the Right Equipment: Use a rod with a flexible tip and appropriate line weights.
- Grip and Position: Hold the rod firmly but gently while standing at a comfortable angle toward the water.
- Master Your Wrist Action: The wrist plays a key role in casting; hence practice your wrist action to produce effortless casts.
- Learn Different Casting Types: Experiment with types like a backhand, overhead, or roll casts until you find what works best.
- Practice Regularly: Consistent approach can help hone your skills with time. Start with short casts and gradually increase the distance over time.
- Controlled Movements Bring Success: Slow movements create more control and improve accuracy compared to quick jerks that lead to errors.
Apart from these steps, focusing on the target location, wind speed, and controlling the line length while casting can improve proficiency.
Pro Tip: Take adequate breaks between practices to avoid fatigue that may lead to sloppy casts.
Even the best of casts can turn sour, but don’t worry, troubleshooting casting problems is just like untangling a knot – it takes patience and a bit of swearing.
Troubleshooting Casting Problems
Casting Troubleshooting:
Casting problems can compromise your productivity in the foundry. To avoid delays, consider these six tips:
- Check for mold density issues.
- Evaluate the pouring temperature on the pour hole.
- Analyze and address issues with sand quality.
- Inspect the gating and riser system for blockages or tapering.
- Furnace maintenance/repair is crucial to maintain your equipment at optimum capacity.
- Scrap sorting optimization could help mitigate contaminated casting defects.
Furthermore, consider implementing preventive measures such as training programs and daily cleaning tasks to ensure that casting operations are given adequate attention. Finally, a Pro Tip is to adopt a sensor-based monitoring approach in strategic parts of the production line to detect emerging issues before they escalate.
Remember, in casting, as in life, the key is to aim high, but not so high you snagged a passing seagull.
Conclusion and Tips
To wrap up your fly fishing rod setup with storage and success tips, we’ve discussed the key steps to configure your fly fishing rod successfully. To ensure your equipment lasts for seasons to come, we’ll explore some essential strategies for storing your gear. Additionally, we’ll offer some extra tips for improving your fly fishing techniques and increasing your chances of success on the water.
Storing Your Equipment
Storing Your Tools
To ensure your equipment lasts longer, proper storage is crucial. Here are some tips to help you store your tools correctly:
- Clean and oil metal tools before storage to avoid rust.
- Hang larger tools on designated hooks or nails on the wall.
- Store smaller tools in a toolbox or cabinet with dividers to prevent damage.
- Keep power tools in their original cases and store them in a dry place.
It’s also essential to store any hazardous materials away from children and pets.
In addition, storing your equipment properly reduces stress during future work, as everything will be organized and easily accessible when required.
According to the American Ladder Institute, over 300 ladder-related deaths occur annually in the U.S. Be careful when storing ladders, as incorrect storage can affect their integrity.
Remember, the fish are not social distancing, so ensure your hooks are!
Additional Tips for Fly Fishing Success
To maximize your success in fly fishing, here are a few extra tips to consider:
- always pay attention to the weather forecast and plan accordingly.
- choose the right equipment and keep it well-maintained.
- Lastly, constantly educate yourself on new techniques and trends in the industry.
Regarding fly fishing, success is often determined by the slightest of details or variables. Therefore, caring for these little things can make a big difference in getting more bites and catches. Keep these Additional Tips for Fly Fishing Success in mind for a better chance of reeling in your catch.
To further enhance your chances of getting successful catches while fly fishing, it’s important to understand intricate details like fish behaviors, currents, insects’ hatching seasons, and many other things that affect the quality of your experience.
Once upon a time, following some Additional Tips for Fly Fishing Success, like reading up on entomology and keeping multiple types of flies handy for various hatching stages, proved invaluable as the fish kept ignoring everything else. This was an example where paying attention to small but crucial details paid off handsomely!