Weaving is an ancient form of textile production that involves interlacing threads to create a fabric. The art of weaving dates back to prehistoric times and has played an integral role in the development of human civilizations. Weaving techniques vary across cultures and regions, giving rise to a diverse range of fabrics and patterns.
Different types of weaving include:
- Tapestry weaving involves creating intricate designs using colored weft threads over a plain warp.
- Plain weave is the simplest form of weaving where the weft thread passes over one warp thread and under another in a repeated pattern.
- Twill weave creates diagonal patterns by passing the weft thread over two or more warp threads at a time.
- Basketweave involves weaving two or more weft threads together over two or more warp threads to create a checkered pattern.
- Leno weave creates lacy openwork by twisting pairs of warp threads around each other while passing the weft thread through in alternating directions.
The history of weaving is rich with stories of innovation and cultural significance. For example, Navajo blankets woven by Native American women were originally used for warmth but later gained importance as symbols of status and wealth within the tribe. Today, weaving continues to evolve as new techniques are developed alongside trends in fashion and artistry.
Get ready to weave your way through the different techniques, and be warned: it’s not for the thread-faint-hearted.
How to Start Weaving
In this article, we will explore the various weaving techniques available for those interested in the craft. Weaving is an art that involves combining warp and weft yarns to create a variety of designs. Here are some common types of weaving techniques:
| Technique Name | Description |
| Plain Weave | The most basic and frequently used weaving technique. It produces a checkerboard effect and is ideal for creating patterns. |
| Twill Weave | A weaving technique that produces diagonal lines on the fabric. It is commonly used in denim fabric and is more durable than plain weave. |
| Satin Weave | This technique uses long floats in the weft yarns, resulting in a lustrous fabric. It is commonly used in upholstery and formal wear. |
For those interested in creating more intricate designs, tapestry weaving is a great option. It involves creating a design by weaving a weft yarn through a warp yarn, using different colors to create the desired outcome. And for those interested in sustainability, eco-friendly weaving is becoming increasingly popular. This technique involves using natural materials, such as bamboo or hemp, to create textiles.
Pro Tip: Before starting any weaving project, consider the type of yarn and loom that will be used. Different types of yarn can create different textures and effects, and the size of the loom will affect the size of the project.
Weaving may be a tedious task, but at least your tapestry won’t judge you for binge-watching Netflix while working.
Tapestry Weaving
| Tapestry Weaving | |
| Definition | A process of creating cloth with intricate designs and images |
| Materials Required | Loom, Warp Threads, and Weft Threads |
| Techniques | Slit Technique, Interlocking Technique, Toccolo Weave |
In addition to the standard tapestry weaving processes such as the slit technique and interlocking technique, the toccolo weave uses small bundles of threads for added depth in the design.
The history of tapestry weaving dates back thousands of years, originating in Egypt but popularized during medieval times in Europe. It was often used as a form of storytelling through art, depicting religious or historical events on woven tapestries that adorned castle walls.
Navajo weaving: because sometimes you just need a rug that’s as cozy as a hug from grandma.
Navajo Weaving
Navajo Weaving is a traditional art form of the Navajo Native American tribe. This weaving technique has been in practice for centuries and is a symbol of the Native American culture. The unique style, patterns and colors used in Navajo Weaving are derived from the natural surroundings.
| Columns | Details |
| History & Origin | The origin of Navajo weaving dates back to around 1650 AD when they learned the techniques from Puebloan tribes. |
| Materials Used | Wool sourced from local sheep, traditional vegetable dyes which are made using natural sources like berries, barks and roots. |
| Styles and Patterns | The most common styles include striped pattern, diamond pattern, lightning pattern etc. |
Along with intricate patterns and vibrant colors, a Navajo rug also tells a story through its design that reflects the cultural beliefs of the Navajo people. These rugs are also used as a significant source of income by many Navajo families.
If you wish to learn more about this beautiful art form, you can attend workshops conducted by the Navajo weavers themselves. By doing so, you can immerse yourself in their culture and understand the significance behind each design and pattern. Practicing patience is essential while learning this weaving technique as creating even one complete piece requires considerable time and effort.
Who knew weaving baskets could be so interesting? Time to hone my skills and start gifting my friends with some questionable looking fruit baskets.
Basket Weaving
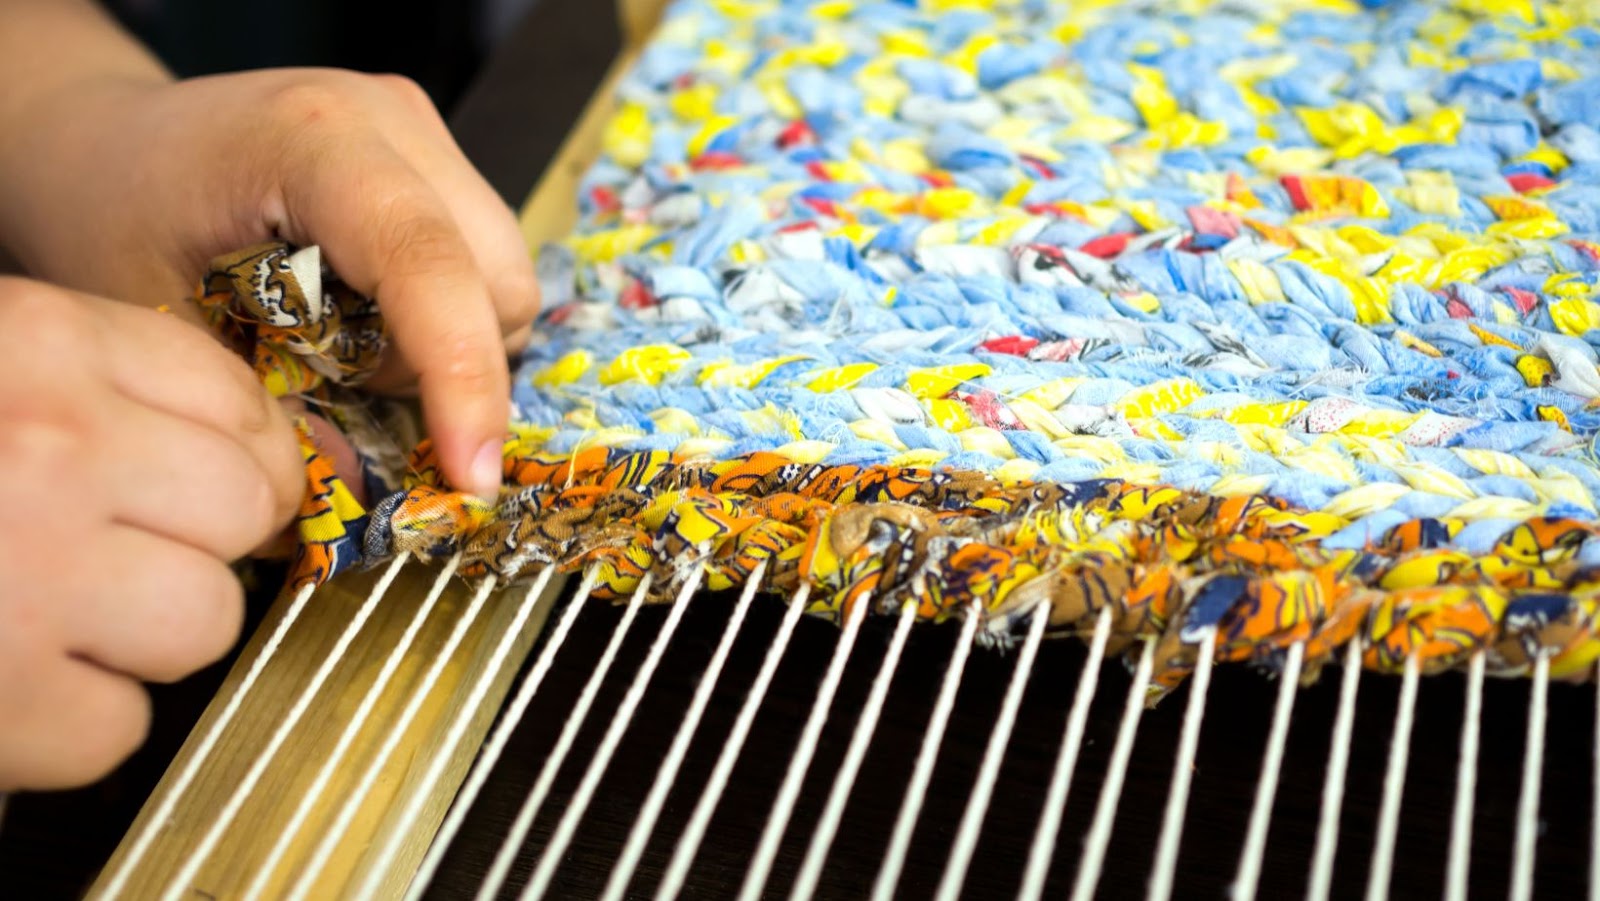
Weaving natural fibers into functional products has been an ancient practice for ages. In this category falls Basket making, the art of weaving decorative or functional baskets from plant materials such as leaves, stems, barks, and twigs. Using a combination of over-under weaving techniques to interlace those above-mentioned craft items in a specific pattern results in creating durable and attractive baskets.
The pliable nature of the plant fibers plays a vital role in basket weaving. These natural materials are first selected and prepared according to their suitability to be woven together. While some plants are robust and sturdy, others have delicate finesse that contributes towards creating intricate details in the final basket product. Additionally, the finishing touches involve dyeing and decoratively trimming these plant fibers to add colors or designs to the basket’s surface.
Incorporating various materials like shells, leather, glass beads with plants adds another dimension of richness to an already unique basket design. Weaving patterns can vary depending on regionality or intended use such as carrying goods or cooking.
Pro Tip: Before taking up Basket weaving as a hobby or profession, research your local available indigenous plants suitable for making baskets; this ensures using sustainable resources while preserving traditional practices associated with this craft form.
Backstrap weaving: when you really want to feel like you’re going nowhere fast.
Backstrap Weaving
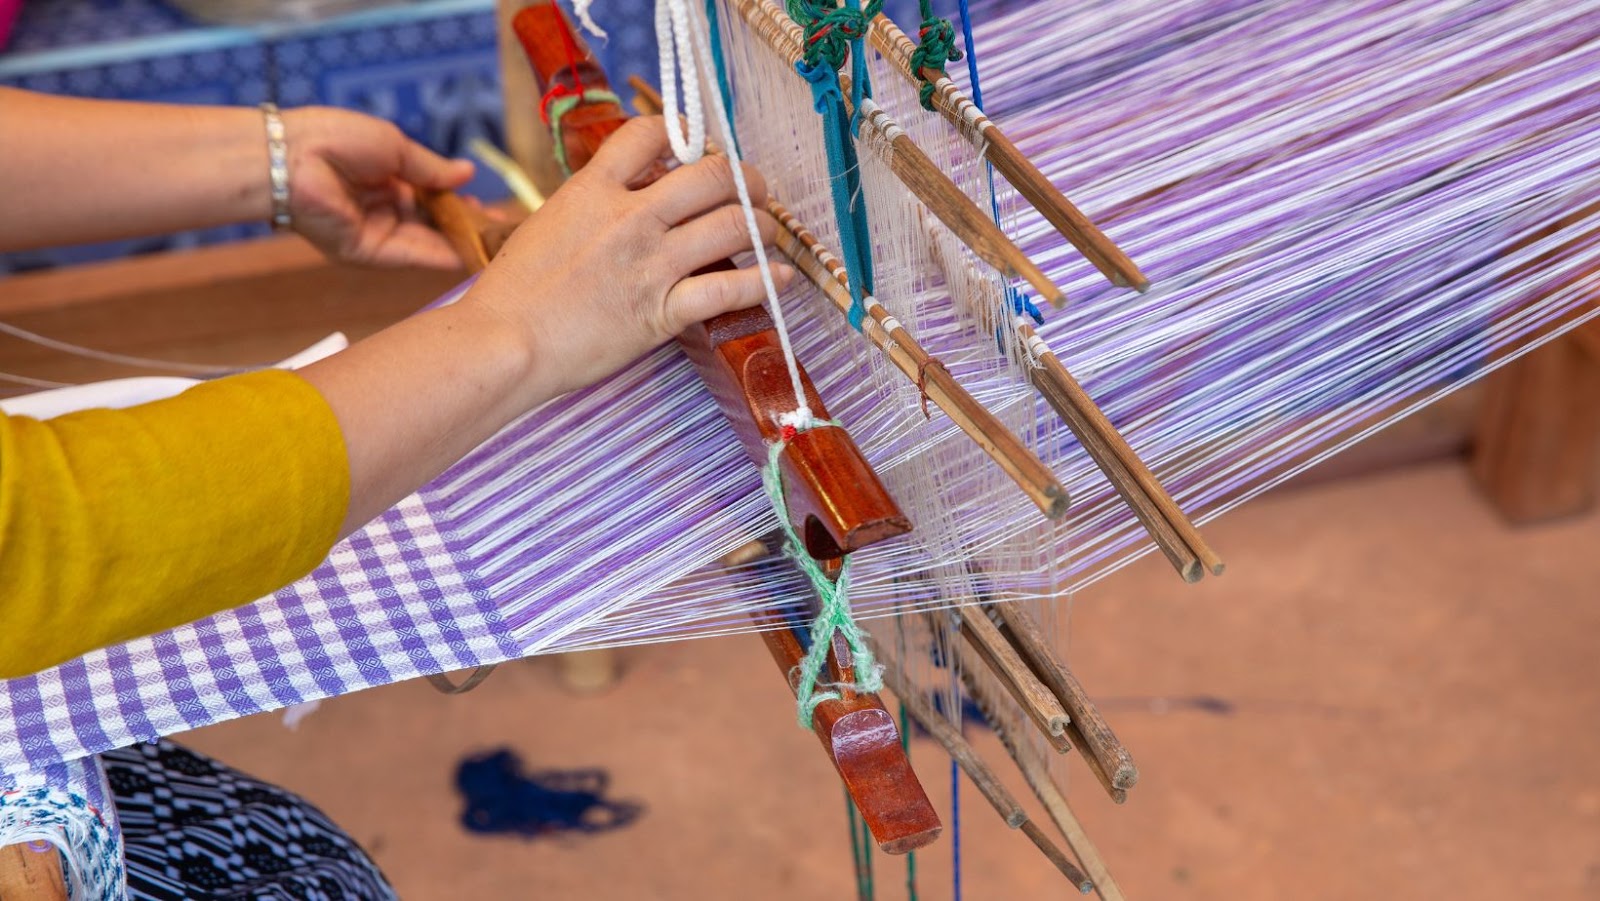
A weaving technique that uses a ‘belt’ around the waist of the weaver to create tension in the warp threads is a unique approach known as Body-tension weaving. In this method, the individual creates intricate designs with precision and skill.
The table below depicts the essential details of body-tension weaving:
| Types of Weave | Body-tension |
| Tools Used | Backstrap loom, shuttle, yarn/thread, and beater |
| Materials Used | Cotton or wool-based thread/yarn |
| Characteristic Features | Intricate patterns, versatility in design, portability |
Body-tension weaving is also known for its unique history. Experts believe it originated in ancient times and was passed down from generation to generation orally. This technique was used widely across different cultures.
A True Fact: The backstrap weaving technique has been practiced for centuries by indigenous people all over the world, including parts of South America, Africa, Southeast Asia and Central Asia.
Who knew that weaving simple bands could be so rewarding? Inkle weaving: the gateway drug to the world of textile art.
Inkle Weaving
A table showcasing the Inkle weaving process:
| Column 1 | Column 2 |
| Weaving Equipment | Inkle Loom |
| Warping Technique | Front to back warping method |
| Weaving Material | Yarns of wool or cotton |
| Pattern Making | Pick-up or Graphing methods |
It’s worth noting that Inkle weaving patterns are highly customizable and can be achieved using different techniques such as pick-up or graphing method. The patterns and designs produced have unique geometric shapes and vivid colors.
Pro Tip: To make your inkle woven product sturdier, try using thick yarns for the weft threads. Why settle for a plain weave when you can deck your cards and weave like a boss?
Card Weaving
As one of the many ancient methods of weaving, card weaving involves using rectangular cards with holes and notches on the edges to create various patterns. Each card can be rotated independently, allowing the creation of intricate designs.
Card Weaving Basics
Card weaving utilizes rectangular cards with notches and holes on each edge. These cards are independent from each other and are rotated to allow new patterns to form.
Example Uses of Card Weaving
- Materials commonly used in card weaving include yarn or other fibers, shuttle sticks, scissors, and a loom or similar frame to hold the weavings in place.
- Clothing accessories such as belts, straps, bracelets, as well as decorative trims on clothing or pinned pieces for cloaks.
Technique Steps
The process involves threading warp threads through the holes of the cards and setting up a warp tension before interlacing weft threads between the cards and behind selected warp threads to create patterns. The finished piece is then removed from the loom and finished according to preference.
Historical uses in medieval times for securing armor;
Interestingly enough, historians have found slits indicating that woven fabrics were once used over 20,000 years ago at Dolni Vestonice in Czech Republic.
Before choosing your weaving equipment, make sure you ask yourself: ‘Will this loom make my living room look like a medieval castle?’
Choosing the Right Equipment for Weaving
Paragraph 1: To ensure a successful weaving experience, it is crucial to carefully select suitable equipment. Proper equipment selection is imperative to achieve desired results and reduce frustration.
Paragraph 2: Equipment selection is a vital aspect of weaving, and it is essential to choose the right tools as per your needs. The following table summarizes the key factors to consider while selecting weaving equipment.
| Equipment | Details |
| Looms | Type, size, portability |
| Shuttles | Material, size, type |
| Reeds | Material, size, dent |
| Yarns | Fiber, weight, texture |
Paragraph 3: While choosing the right equipment for weaving, one must consider the desired outcome, skill level, and budget. For beginners, it is better to start with a simple rigid heddle loom and a selection of yarns before investing in expensive equipment.
Paragraph 4: According to the Handweavers Guild of America, well-made equipment is durable and can last for decades, making it a good investment for serious weavers. Choosing the right loom is like finding the perfect partner- it takes time, effort, and a lot of trial and error.
Loom Selection
Weaving Equipment Selection:
When choosing equipment for weaving, selecting the appropriate loom is crucial. The loom selection impacts the outcome of the weaving process significantly. Here are various factors to consider when selecting a loom:
Table – Loom Selection
| Loom Type | Description | Ideal For |
| Rigid heddle loom | Simple and compact design with easy maneuverability | Beginners, small projects |
| Tabletop or floor looms | Sturdy frame structure with greater complexity and more versatility in patterns | Experienced weavers, larger projects |
| Shaft looms | Uses multiple shafts to enable more complicated patterning capabilities | Advanced weavers |
Different types of looms offer varying benefits for different skill levels and project requirements.
Pro Tip: Before making a final decision on a loom, consider taking an introductory weaving class to test out different types of equipment firsthand.
When it comes to yarn selection, remember: the right choice can weave a beautiful tapestry, while the wrong one can leave you tangled up in knots.
Yarn Selection
For selecting the appropriate yarn to use, consider the material’s weight, texture and durability. The right selection can determine the outcome of your weaving project.
| Yarn Material | Weight (oz) | Texture | Durability |
| Wool | 1-4 | Soft | High |
| Cotton | 2-8 | Smooth | Medium-High |
| Silk | 0.5-2 | Shiny | Low-Medium |
| Acrylic | 3-6 | Coarse | Low |
It is important to understand that different weaves require specific yarn types. For instance, a finer woven piece would require silk while a heavier one requires cotton or wool. Additionally, some materials will produce softer results compared to others based on their texture.
Pro tip: Always purchase additional skeins of yarn to avoid running out midway through the project and match dye lot numbers for consistent color throughout your weave.
Choosing the right shuttle is essential for successful weaving – unless you’re aiming for a project that looks like it was made by a drunk spider.
Shuttle Selection
Selecting the right weaving shuttle can be a challenging task. The key is to choose one that matches the type of yarn and fabric you are using.
For efficient shuttle selection, we recommend considering factors such as material, weight, size, and shape. You can refer to the table below for detailed information on selecting the perfect shuttle.
| Material | Weight | Size | Shape | |
| Suggested Use Cases: | Traditional Yarns | Medium | Regular | Boat |
| Fine Yarns | Light | Small | Bullet | |
| Novelty Yarns | Heavy | Large | Rag |
In addition to these factors, it is also important to consider issues such as personal preferences and experience level when choosing a shuttle for your next weaving project.
Did you know? According to the weaving experts at Schacht Spindle Company, shuttles come in a variety of shapes and sizes – each designed for specific yarn types and fabric weights.
Get your loom and threads ready, because it’s time to weave some magic and create the ultimate masterpiece.
Setting up for Weaving
Paragraph 1 – Starting off with weaving requires meticulous preparation. With the right tools and materials at hand, it’s crucial to create an optimal workspace before diving in.
Paragraph 2 – Here is a quick 4-step guide to set up for weaving:
- Choose the right loom that suits your needs.
- Select appropriate yarns and a shuttle for weaving.
- Adjust the loom’s tension and set up warp threads.
- Create an ergonomic and organized working area.
Paragraph 3 – When setting up for weaving, it’s essential to keep the area clean and free from debris that can interfere with the weaving process. Moreover, it’s vital to keep the loom adjusted for optimal weaving conditions.
Paragraph 4 – Pro Tip: Keep your hands free from oils, lotions, or perfumes when weaving to avoid residue buildup on the yarns.
If you’re feeling wound up about winding the warp, just remember – you’re one step closer to creating your own masterpiece.
Winding the Warp
The process of creating the foundational yarns for weaving, known as ‘creating a warp’, requires precision and attention to detail. To begin ‘Winding the foundation yarns,’ one must first determine the length, width, fiber type, and desired pattern of the fabric.
- Secure the end of a pre-measured warp section using either a warping board or warping mill.
- Wrap sections around pegs or mills, and secure each rotation with ties.
- Carefully transfer these sections onto a warp beam to reduce tension on individual threads.
- Create cross ties between layers at intervals to prevent tangling or shifting during weaving.
While some weavers may opt to pre-cut their thread segments before winding them onto the beam, many prefer to weave directly from this beaming process due to its efficiency in reducing tangles.
During early textile production, handwoven fabrics were vital components in clothing and household items like blankets. The skill required in spinning thread and weaving cloth by hand was valued both socially and economically as it provided livelihoods before widespread industrialization.
Time to get our weave on and warp up this loom before our patience unravels.
Warping the Loom
The process of preparing the loom for weaving is known as ‘Warping’. It involves setting up the foundation of threads that run lengthwise through the loom and hold a weaver’s project in place. The following steps will guide you on how to warp your loom professionally.
- Measure the length required for weaving and cut the warp threads.
- Tie one end of each thread onto the warping board or pegs.
- Wind all the threads onto a warping reel, keeping them parallel.
- Tie the other end of each thread to your loom’s back bar or apron rod.
- Thread each individual warp through heddles and reeds according to your desired pattern.
When warping, it’s important to remember that consistent tension and straight edges are crucial for a beautiful weave outcome. Additionally, be mindful while handling delicate fibers such as silk or mohair.
Pro Tip: Before beginning any weaving project, always test your weft yarns’ colors and textures against the warp threads to ensure compatibility and coherence between them.
Get ready to weave some magic with these basic techniques that will have even the most uncoordinated hands creating masterpieces.
Basic Weaving Techniques
Weaving is an ancient art that has been passed down for centuries. Understanding the fundamental weaving techniques is essential to master advanced techniques. Here’s a concise guide on how to get started:
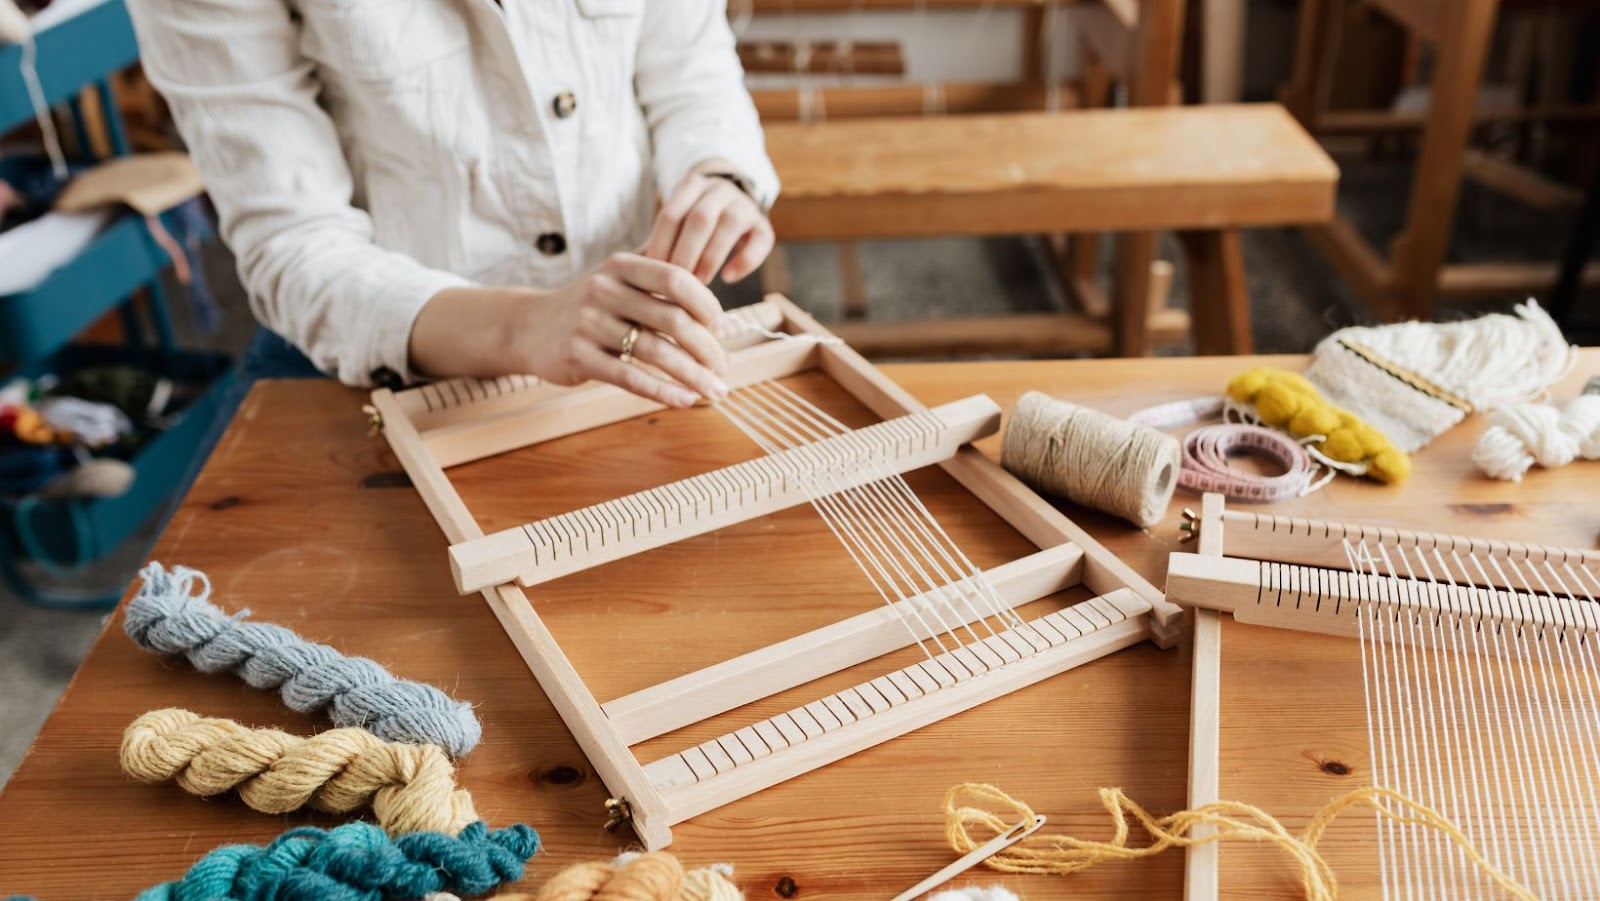
- Choose the Right Loom: Invest in the right loom for your project. A rigid heddle loom is popular among beginner weavers, while a floor loom is suitable for larger projects.
- Set-up Your Loom: Before starting, ensure that your loom is correctly warped. Identify the proper tension and make sure that the reed and heddles are in the right positions.
- Weave Your Project: Once your loom is set up, it’s time to weave. Start by creating the weft, which passes over and under each warp thread. Then, repeat the weaving process, ensuring that your project has consistent tension.
Uniquely, weaving techniques vary depending on the user’s personal preferences. However, depending on factors such as the type of materials and the loom used, many different patterns can be created. Understanding these details can help you create unique and visually appealing finished products.
Did you know that many ancient civilizations, such as the ancient Egyptians and Greeks, used weaving for various purposes? They used different weaving techniques to produce clothes, tapestries, and even art pieces. This technique has withstood the test of time and remains a popular activity for both personal and professional use.
Plain weave: the baseline of weaving, like a plain black T-shirt in a wardrobe full of sequins and feathers.
Plain Weave
Using the most classic and fundamental of weaving techniques, a tightly knit design is produced. This basic method, also known as a plain weave, consists of alternating warp and weft threads that are passed over and under each other in a consistent pattern to create an even structure.
| Number of warps | Even number |
| Number of wefts | Even number |
| Weft count | Equal to the warp count |
In a plain weave, the number of warps is always even and so is the number of wefts. A unique detail of this method includes the equal weft count which always matches the warp count. In this way, a solid and durable fabric is formed.
Dating back thousands of years to ancient civilizations such as Egypt and Peru, plain weaving has been used for practical purposes such as clothing and shelter construction but also for expressing creativity through decorative trends.
Get your twill on and weave like it’s nobody’s business – just ignore the weird looks from your non-crafty friends.
Twill Weave
A type of fabric pattern, characterized by diagonal lines formed on the surface of the cloth resulting from interlocking at least two or more threads in a particular sequence is commonly known as diagonal weaving. When interlacing short-weft threads (floating over/under some warp threads) with long-warps (creating a 45-degree line), it is recognized as twill weave.
To comprehend better, take a look at the following table:
| Warp Ends | Weft Order 1 | Weft Order 2 |
| 1 | ● | ○ |
| 2 | ○ | ○ |
| 3 | ● | ● |
| 4 | ○ | ● |
The above table represents weaving that interlaces short-wefts or filler threads floating over and/or under several consecutive warps – although each thread might have its specific path to follow. Moving onto the next paragraph for additional information would be useful.
Twill weave construction cycles with staggered relationship among weft and warp make it much easier to withstand wear and tear—such as jeans or chinos, which utilize diagonal patterns fittingly received popular applause. The distinction between left hand over right and vice versa determines different twill forms. However, blending more than two sets of yarns can create even more elaborate twill patterns than standard diagonals. Applying different materials—such as wool for warmth—augments versatility.
Pro Tip: Employ alternating colors tightly adjusted angles to highlight your design, such as herringbone or diamond-pattern options.
Get ready to feel like royalty with the luxurious satin weave – unless your kingdom is made of paper towels, in which case, move along.
Satin Weave
Using a tight weave and a smooth surface, the striking variation known as a Single Weft Satin is commonly used in high-quality fabrics. The weaving strategy includes ‘floats’ or groups of weft threads that cross over several warp threads to create a weave with fewer interlacings. The result is a material with increased shine and softness and, depending on yarn quality and thread count, added durability.
| Satin Weave | Details |
| Structure | A closer set of wefts cover more warp strands that give it the shine. |
| Appearance | A glossy finish with soft hand feel |
| Purpose | Commonly used in high-quality fabrics for home decor, apparel or linens like silk or sateen. |
Further to its simple yet elegant form, the satin weave has excellent quality qualities that make it an ideal choice for clothing projects needing extra durability or adorns such as decorative pillows. Additionally, this style is less prone to snagging or wrinkling due to its flatness.
Creatively using variations of satin weave-style fabric effects will involve different fiber types relying on thread count density during production. A few patterns are checkered satins sporting contrasting color blocks woven from other fibers like polyesters while still keeping their lustrous sheen.
Aiming for unique textures in our fabrics shows just how versatile the satin weave can be. Combining materials for an enticing blend offers endless weaving possibilities. With proper care such as washing at low tumbles and ironing at low temperature ensures that your satin weave projects stay in top shape much longer than you expect! Even if your weaving turns out wonky, just remember, it’s not a mistake, it’s a handmade feature.